Monday, September 1, 2014

Cake shots!!!


It's been a while now since I have blogged. I have been busy doing cakes all through the week and on weekends, and have ended up with a stack of cake  crowns. 

While otherwise cake crowns don't last long in our house (my children can't wait till i have leveled a cake for decorating so that they can gobble down the crowns), my family was on vacation and hence cake leftovers. For once I had cake crowns left to recycle them into something beautiful and yummy!.

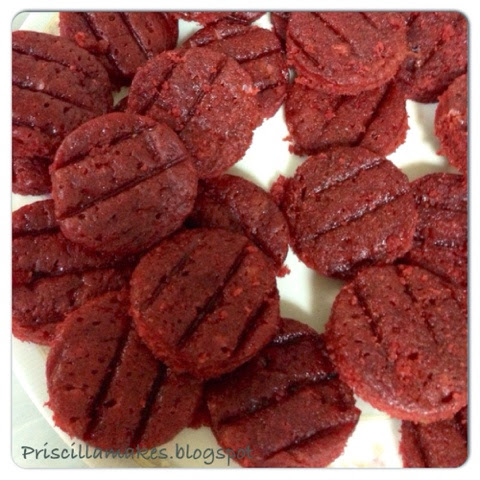
I took two 10 inch round cake crowns that I had cut out of 10 inch cakes.


With a small round cutter, the size of a dessert glass (oh I so love these dessert glasses, they bring out your creative side), I cut out circles. 


I layered the circles into the dessert glasses alternating them with cream cheese frosting. The cream cheese frosting was also made from leftover buttercream. I simply added Philadelphia cream cheese to the buttercream to get a lovely creamy textured cream cheese. 


Refrigerated these beauties and headed to the airport to receive my family, knowing well that they would indulge themselves in this simple, tasty and tempting dessert as soon as they got home.... But before that they had to have their dinner and .... Leave room for dessert.

Now for making cake jars..all I need are some mason jars.... 

Monday, July 21, 2014

Erika Makes - Asian Orange Chicken


Last weekend Erika threw a tantrum saying she wanted to eat Orange Chicken so we visited  PF Chang's for dinner. That was not all, we had to prepare it at home, so we google searched the recipe and guess what we found it at allrecipes.com.  We shopped for the groceries and got down to preparing it for dinner.

Now this was not a dish I prepared. I only assisted Erika with fyring the chicken. Oh here's the recipe http://allrecipes.com/recipe/asian-orange-chicken/

According to the reviews, many suggested coating the chicken with egg before coating with  flour. It does help... We also adjusted the cornflour as suggested. We mixed 1 tablespoon cornflour with 2 tablespoons of water.  And we substituted the rice vinegar with apple cider vinegar as rice vinegar is not available in Kuwait (and don't go looking for it... don't ask me why???).

Erika was very happy with herself...that she had prepared a dish which is served at PF Chang's.... and that it tasted absolutely yummy.  Yes, this ones a keeper...

Proud of Erika!!!! Thank you for the scrumptious dinner. 


Sunday, July 20, 2014

Quesadilla


While shopping at TSC, Erika picked up a packet of tortilla and I knew just exactly what she was thinking. So I picked up the shredded mozzarella cheese and the rest of the ingredients. 

Last night we got busy cooking. Erika brought the laptop into the kitchen to follow the recipe. 

Makes 2 quesadillas

You will need:
4 tortillas 
Olive oil 
300-400 grams shredded mozzarella cheese. 
2 halves chicken breast 
Ginger garlic paste
Salt
1/2 lemon juice
1 onion sliced
1 tomato sliced
1/2 colored capsicum sliced
1/2 carrot sliced 
1 cup lettuce chopped 
Pepper
 
Preparation:
Cut chicken into small cubes. Marinate with salt, ginger garlic paste and lemon juice for 15 mins. 
Meanwhile cut onions, tomatoes, capsicum, carrot and lettuce. 
Heat 2 tbsp oil and sauté onions, capsicum and carrots. Add chicken and stir fry for 5 mins. Add tomatoes and let cook on low flame for 10mins. Add lettuce and cook for another 5 mins. The quesadilla filling is ready. 

For the quesadilla:  On a low flame, drizzle 1 tbsp oil in a frying pan. Place tortilla on the pan. Scatter some of the shredded mozzarella cheese on the tortilla. 

Then place 1/2 of the cooked chicken on the cheese. 

Sprinkle pepper and scatter cheese over the chicken.

Cover with tortilla.  Cover the pan and let it cook on a low flame for 5 mins. 


Lift the tortilla using a wide spatula and drizzle oil on the frying pan. Then flip the tortilla and cook the other side  for 5 minutes wih the pan covered.


Remove and place onto a serving plate. 


Cut tortilla into 6 wedges and serve. 

In the original recipe the chicken is not cooked. Instead after scattering the cheese on the tortilla sinply scatter the marinated chicken and all the veggies, season with pepper, then add the cheese and cover with the tortilla. Cook for 10 minutes on each side on a low flame. 

We tried both versions of the recipe, both taste the same. 

You can add more seasoning if you wish to. You can also use shredded cheddar cheese instead of mozzarella. You can almost add any meat for the filling with a lot  of add-ons that suit your palate. 

This Mexican appetizer is a favorite of Shawn and Erika's. After all it's finger food.....

Monday, July 14, 2014

Jewel in the crown - cake

A friend of ours sent me this picture....saying "what say amazing cake", and I sprang to the opportunity, which otherwise was on my low priority "to do" list.


I looked up the tutorial and decided to make it a weekend project as it involved baking two cakes with cooling time between the two. 

I decided to bake  my cake from scratch and not to use the cake mix as I have never used cake mix. After coloring the batter which I did in individual bowls, I realized that I should have poured the batter into the measuring cup, colored it one at a time and then poured it out into the zipper bag. 


A cup of Pink, blue, yellow, green and orange cake batter ready to be strewned into the cake pan to give it a tie-dye effect. 


This is the fun part and the most agonizing part too. Piping out the batter from the zipper bag after snipping a small corner was painstaking and pretty messy. At a point I had batter coming out from both ends of the zipper bag making it very messy. My fingers went numb piping the batter and my brain went numb having to remind myself that I need to pipe a little of each color to achieve the tie-dye effect. 

It took a little less than 30 minutes to color and pipe out the cake batter into the pan, while otherwise it would take only 1 minute to pour the batter into the pan. And It took exactly 70 mins to bake. 


Gorgeous looking colorful cake. Felt like eating it right away. Left it overnight on the rack to cool.

The next day I cut the cake into 1 inch slices and cut out hearts using a heart shaped cutter. Placed them in the frezzer for about 4 hours.


I prepared the cake batter for the second cake. Poured a cup full of batter into the pan and lined up the frozen heart shaped cake in the middle of the cake pan, then filled in the sides and covered the top with batter. The pan was a little more than 3/4 filled and I had my doubts so I let go some of the batter so that the batter would not overflow while baking.      


It took 90 minutes to bake and there was this huge mountain in the middle which was taking a lot of time to bake. I was worried about the sides getting burnt, but that did not happen. Pulled out the cake from the oven and tossed it on the rack to cool.

When the cake had cooled and it was time to cut through I was trembling and felt like I was competing in Masterchief. Had to do what I had to do and ta da....

Oh!!! the hearts had risen.....and i missed a heart beat...I knew what had happened, but then that is not what should happen, so what should be done so that it does not happen?????????  too many questions on my mind.. 


I looked for more tutorials and found this https://www.youtube.com/watch?feature=youtube_gdata_player&v=jBoqh8M8ltU&app=desktop I will follow this tutorial the next time I make this cake.

My cake earned its name "jewel in the crown". Hudson, who inspired me to bake the cake named the cake so, to cheer me up.  I am sure going to try it out again....

Wednesday, July 9, 2014

Instant Poha


Today I made poha for the first time. Poha is flattened rice or otherwise known as rice flakes. I bought some with the intention of making it but kept putting it off for some reason or the other. 

I called mom to speak to her and she told me that she had gone visiting my aunt, and that she was served poha which my uncle had prepared. Well that was it... Memorized the recipe and went off to the kitchen to make poha instantly. 

You will need:
100 grams Poha (1 and 1/2 cups).
1 medium potato
A handful peanuts 
2-3 tbsp oil
1 tsp. mustard seeds
6-8 curry leaves
1/4 tsp. turmeric powder
1 small onion finely chopped
1 green chilly finely chopped
Salt
1/2 bunch coriander leaves finely chopped
2 tbsp. fresh grated coconut (optional) 
1 lemon

To prepare:
1. Wash the poha and leave in a strainer to drain the water.
2. Cut the potato into 4 halves and boil it with salt.  
3. Add the peanuts and let them boil with the potato. 
4. In a non-stick pan heat the oil and add mustard seeds and curry leaves.
5. Then add the onions and let them fry till translucent, add chillies, turmeric powder and fry for a minute.  
6. Add the poha and mix well with all the ingredients.  Add salt and simmer for 5 minutes.
7. Cut the boiled potato into small cubes and add to the poha mixture along with the peanuts.
8. Remove into serving dish and garnish with coriander and grated coconut.
9. Serve hot with lemon wedges. 

It tasted just like mom's. She would make it for tea, a perfect snack for a rainy day... I had mine for dinner and it was just right and light. 

Feeling great.... feeling at home. 


Friday, June 27, 2014

Dal Makhani

The king of Dal...


I always thought Dal Makhani was made using a lot of butter... (makhan means butter) and that it got its rich and creamy texture from the butter.  I was also of the opinion that Dal Makhani was a dish reserved for the kings of India and was served in palaces only. When I first had Dal Makhani at Hotel Crowne Plaza, I thought it was a dish served in 5 star hotels only, and yes after eating it I was convinced that its a dish meant for kings and only chef's of 5 star hotels could prepare it.

Little did I know that Dal Makhani is a staple dish of Punjab, and that butter is not the ingredient that gives it its rich and creamy texture and taste. A couple of days ago a member on Chef at Large FB group posted a very tempting  picture of Dal Makhani which she had prepared for her guest, and posted the recipe link too.

Now was my chance to make Dal Makhani at home. So I went to the link 
and read the recipe for the first time. Oh, what is black urad dal, never heard of it, never seen it.... for a person like me who loves dal. Okay, I needed to find this main ingredient and I was right in going to an Indian bakala (grocery shop) where I picked up all the other ingredients too and headed home to soak the dal and kidney beans. I felt like royalty while preparing the Dal Makhani. I learnt that it is the tomato puree and thick cream that gives it its rich and creamy texture and I learnt that it can be prepared at home by almost anyone.

Here's my take on the Dal Makhani.  I made some rotis to go with the it, though it can be served with rice, jeera rice and naan.


Everyone enjoyed it. It was lip smacking, finger licking Dal Makhani. 

While still researching on Dal Makhani, I learnt that though a staple food of Punjab it is a dish prepared at weddings, birthdays and important events, and what makes its special is its traditional way of cooking the dish. 

Dal Makhani, King of Dal.

Thursday, June 26, 2014

The Nikon Cake


I always wanted to make a camera cake for my hubby,  a professional photographer, but feared it would not be my best ever cake, as I don't like to work with black fondant, besides having to carve the cake to look like a camera. 

Reena Martins a good friend, had sent me a tutorial on making the camera cake which I had saved for reference knowing that one day I would make the cake. 

The day came and weeks before that I started preparing myself to build the cake. I figured out that a dense cake would work best for the carving needed and hence baked a marbled mud cake, a favorite  of Cajie's. I baked an 8" square for the body of the camera and a small 2" round for the lens. 

While the cakes were cooling on the kitchen counter, the house was filled with the aroma from the cakes. Later that day I found one fourth of the small round cake eaten. Oh!!!! Now what, looks like the birthday boy wanted to sample his birthday cake... And we had no choice but to keep quiet so as not to let out our surprise.  I had to bake the 2" round cake for the lens which I did while baking another cake.  

I got to putting the cake together, cutting  and carving; 

And then covering it with dark chocolate ganache, yummy!!!  Decided on using ganache against buttercream as ganache  is heavy and dense which would help covering the cake with fondant. 


Working quickly on the lens,  I covered the body with black fondant which looked grey and did not make the cake look like a camer. Now you see why I don't like black fondant. I then painted the fondant black. 


After securing the lens in place I worked on the details which took more time than expected. 


Finished the cake just in time.... I nearly spent the whole day decorating this cake for the love of my life.  Guess what, he loved it. 

After taking pictures of the cake, singing,wishing, hugs n kisses he cut his Nikon Cake and helped himself to a big slice... Afteralll it was his birthday!!!! 


I was happy with the way the cake had turned out. Also want to thank Erika for encouraging me all the way and for keeping the surprise a surprise.   

Bravo!!!! Have a Nikon Cake. 


Monday, June 9, 2014

June Wedding

Yeah!!! I did it. The June wedding cake 


Last month I did my first official wedding cake http://priscillamakes.blogspot.com/2014/05/small-wedding-cake-white-and-gold.html?m=1   
and the very next day I got an order for another wedding cake. This is the cake. 

The theme color was apple green. The calla lilies were a perfect match and this bride definitely knew what she wanted. The couple wanted to serve their guest three different flavours and so the bottom  tier was plain vanilla sponge, the middle tier was red velvet and the top tier was dark chocolate, all filled with yummy buttercream and covered with fondant. 

I got down to making the flowers a week before the D day and could not wait until the cake was ready to decorate it with the flowers. 


After spending a couple of hours decorating the cake, I sat admiring my creation.. Now transporting this beauty was going to be a nightmare in broad day light.  

But before that, I missed hubby, my professional photography who was somewhere in Orlando photographing a lake full of alligators. I must have taken more than a dozen pictures of the cake from all angles and directions, in natural light and spot light,,, whatever you call it, iPhone and a samsung galaxy, Panasonic and an olympus camera; all the cameras lying around the house... No, I did not touch the Nikon... It's untouchable. 

After the photo session I boxed the cake
and chalked out the route I would take to deliver the cake, taking into consideration  all the curves, corners, roundabouts and speed breakers, uphill and downhill. I placed the cake box on a fleece blanket at the rear of my RAV4. The fleece blanket acts as an anti skid sheet and holds the box in place. 

Now for the ride, I got behind the wheel, accompanied with Erika and we drove the car at snail pace, with Erika checking on the cake at every turn and bump. After the longest short distance ride of my life we arrived at the Crowne Plaza hotel. 

We surveyed the Al Andalous ballroom which was beautiful decorated in the theme color for the nuptials ceremony and reception of Amir and Nory.  Spotting the beautifully decorated cake table we centered the cake on the table and gave it the finishing touches. 


Oh what a beauty!!! Could not, but help admire it. The couple are on their honeymoon and I am waiting for a feedback from them.

Now I am all for wedding cakes.. Bring it on!!!!!

Tuesday, May 27, 2014

Momos


 I first heard of momos  (dumplings) from my aunt,who I must say is a genius at Maths and you will wonder what it has to do with momos.... Anyways,  apart from being a famous Maths teacher she does a lot of community service at the church and that's where she encountered momos and the beautiful hands (as described by her) of these East Indian ladies, who made a huge quantity of momos for the church fete, I suppose. 
My aunt told me how easy it was to make momos, but it did not make any sense to me as I was not interested then. 

6 months later Cajie, Roy and Shawn went trekking the harsh terrain of Ladakh and beautiful Leh. Check it out. http://cajie.blogspot.com/2012/08/trekking-padum-to-lamayuru-day-2.html?m=1

On their return from their adventurous trek Cajie mentioned to me that Shawn had relished momos in Leh, the other being Maggie noodles while trekking Ladakh. 

Now, all of a sudden the word momos sounded interesting. I looked up the net and there it was. That evening we had momos for dinner. Shawn relished them. The end... 

Momos 2
After nearly two and a half years I felt the need for change to the regular mince meals. We mostly eat it plain with bread or chappatis or sometimes rice. Occasionally I make mince rolls with soft crepes, or simply add the mince  to a bowl of macaroni or pasta. And on special occasions I make stuffed mince buns....(will save the post for sometime later).

Ok, so I go back to the net for the oh so simple recipe of momos.  Here it is http://m.wikihow.com/Make-Momos    

See how easy it is to make momos!! As for the filling, you can very well go with whatever you have available, beef, chicken, pork, veggies, even Yak meat as originally made in Nepal and Tibet. It takes the same amount of time as you would to make chappatis or crepes. 

               A spoonful on a palmful. 

Momos can be steamed as well as fried. We like it steamed. 20 minutes in the steamer and they are done.


 Hmmm, it's awesome!!! And they taste yummy!!!

Momo, I want more....


Thursday, May 22, 2014

Delicious No-bake Mango Cheesecake.

It's the season of Indian Alphonso mangoes and while you can make mango shakes, mousses, ice-cream, chutneys, jams, preserves or eat them plain, I preferred to make a no-bake cheesecake for the family. 

Introduced to home bakers guild on Facebook, I stumbled on this tried and tested, liked and commented, bragged about no-bake mango cheesecake. No jokes on the bragging... Once you have eaten it you will brag about it yourself.  

You will find the recipe here :

Now "hung curds" could probably be your concern. You start with taking 700 grams of the curd and place it in a clean white cloth, tie around and hang it for 6-8 hours till all the water is drained out. You will be left with 300 to 320 grams of curds.  You are now good to start with preparing the cheesecake... 

Here's my take on the no-bake mango cheesecake. 

 The smooth, silky, velvety no-bake              Mango Cheesecake. Delicious!!!! 

Couple of things I would adjust. 
1. Melt 100 grams butter (instead of 60 grams) and add to the powdered Digestive biscuits. 
2. Soak / Bloom the gelatine prior to straining the mango purée. (Saves time).
3. Garnish / decorate the cheesecake with thinly sliced mango wedges. 

You can enjoy this desset any time of the day.  We actually had it at tea time. 

A must try.... 


Sunday, May 18, 2014

Rabdi

After all that baking and decorating over the past few weeks, I wanted to make something different; a dessert for a change : Rabdi.. 

Thanks to Reena Martins who added me to the group "Chef at Large" on Facebook.  The place is great to share your recipes, food pictures and link to others recipes, like this recipe of Rabdi.    A member on CAL who prepared this recipe was kind enough to share it.

A little about Rabdi...  Rabdi is a delicious Punjabi (North Indian) dessert.  It is made from full fat milk, which is cooked with sugar on a slow flame and allowed to thicken. Cardamom and dry fruits are added half way through the cooking process to add flavour. Traditionally it should take about a little less than 2 hrs or even more to prepare it. But here's a recipe of delicious rabdi that can be made in 30 mins.   Here's the link 

Yes, this one takes 30 minutes only. 
Great dessert. And must say I enjoyed it. Last I remember eating Rabdi at my  
aunt's friend's wedding, some 25 plus 
years ago. 

Rabdi for dessert, bahut swaadish 
(yummy). Enjoy!!!! 

Friday, May 16, 2014

Fairy Cake

Now, this is an old cake, but I just wanted to share it.

I am quite proud of this cake and I couldn't hold back showing you.


Psych! It's actually Erika but I love this cake and I think my mom did a good job. Round of applause for my mom's creativity!

Wednesday, May 14, 2014

Small Wedding Cake : White and Gold.

You are not going to believe this . This is the first wedding cake I have made. 


Yes, officially the first wedding cake.  The only other two wedding cakes I made were for my brother's wedding and my in-laws 50th wedding anniversary. Well I have made two and three tier cakes for other occasions like birthdays, anniversaries and engagement, so making this one was a piece of cake. 

I was expecting the bride to be like all other brides, having in mind her dream cake for her wedding. This bride had just one thing in mind "gold". I was left clueless. I  gathered information on this gold color theme with regards to the bridal bouquet, bridesmaids dresses, decor and based on that decided on making gold roses. 

I went back to the youtube video made by Erika on how to make roses out of play dough http://m.youtube.com/watch?v=6FK44JhxSgE
She was barely 6 years old when she showed us how easy it was to make roses. Won't you agree?

The cake was red velvet,  filled with buttercream and covered with white fondant. I brushed the fondant roses with a dash of gold luster dust. 

The bride loved it...(I was told that a portion of the cake was headed to Goa for family who could not make it to Kuwait for the wedding). 

Done with the first wedding cake, and the very next day I got an order for another wedding cake. That's coming up in June. Stay tuned as I will post my experiences here. 

Till then Mother's day celebrations!!! 


Tuesday, May 13, 2014

It's not Priscilla!

Hello everyone! This is not really Priscilla but her 10 year old daughter instead. My name is Erika if you don't know. This is me playing a sort of prank on my mom. I'm always telling her to blog, but I get no reply. Every post that she posts I'll get real excited. So I'm blogging for her. Hehehe. Okay, bye!

Sunday, May 11, 2014

Red Velvet madness

That was a long wait since my first post. I have been marathon baking since then.. Baking nothing but red velvet cakes and cupcakes. Red velvet madness!!!! It's been the flavour of the month, or should I say, the season. With 144 cupcakes for a 1st Holy Communion party, I lost count of how many cupcakes I had baked, and had to empty my refrigerator to accommodate these beauties. 


Decorating 144 cupcakes was not an easy task. There was buttercream and cupcakes all over the kitchen, covering every inch of counter space. 

A red velvet cupcake with a swirl of sweet yummy buttercream and a fondant disc for the host with a dash of gold and green sugar sprinkles (party theme colors) made a perfect 1st Holy Communion cupcake. 


Transporting the cupcakes was going to be a daunting task, without having to toss the boxes. It was only right to have them packed in big sturdy boxes, making it easy to handle. 


3 boxes accommodating 48 cupcakes in each box, well thought. All the cupcakes arrived their destination safe and sound.
Phew!!!!  

Had to treat myself my favorite Pani Puri before heading home. 

Friday, May 2, 2014

Meet Me...

Hello,

At last, here I am blogging. I, Priscilla Barretto, consider myself a cake artist. I have been decorating cakes since 2002. It has been my passion and obsession. Hence my website www.cakeobsessed.com.  Baking and cake decorating leave me with very little time for anything at all, but my 10 year old daughter Erika who has her own blog, www.allabouterikabarretto.blogspot.com, has inspired me to blog. 

Now that I have started blogging you will see more of Priscilla and all that Priscilla makes, until then red velvet cupcakes!!!

Bebinca