Monday, January 5, 2015

Bebinca

I know it's been a while, a long wait, but then I was accommodating myself to something new in my life.... That later. Now I want to share my new found love for preparing Bebinca, a Goan dessert.


Preparing bebinca, the traditional way, is no easy task and is very time consuming. Perhaps that is the reason I did not venture into making bebinca. Besides whenever we went to Goa we bought some and satisfied our cravings. 

Last year during Christmas I thought of making bebinca. I browsed the net looking for an easy method to making bebinca. And guess what? There is no easy method, at least it doesn't come under the 30 mins meal category.  Now get ready for this... It takes 7 to 8 hours. Yes you heard me right 7-8 hours of cooking time. You may think I am referring to the traditional method of cooking bebinca but no. Not the traditional method, as I have not used that method to cook my bebinca, but the modern method using an oven.

Traditionally bebinca is cooked by placing hot burning coal on the lid of the pot, in which it is cooking because it is the top that needs to cook.  Oh this sounds confusing.

Okay, so what is bebinca and why is it cooked the way it is cooked?

Bebinca is a layered sweet pudding made from a batter of coconut milk, sugar, egg yolks, flour, grated nutmeg and ghee. A big spoonful or two of the batter is cooked on a slow fire in a greased pan for 20-30 mins, followed by a spoonful of ghee spread on the top and then the process is repeated, allowing each layer to cook for 30 mins. The hot burning coal placed on the lid cooks the layers from the top.  To cook the bebinca in the oven you need to actually switch to grill mode. This is something I did not know, and in the process of baking the bebinca I would end up with two layers burnt from under, until I decided to first check out the right way of doing it.

I posted my query on Goan Culinary Network a Facebook group dedicated to Goan Food and Culture, and to my rescue came my very own neighbor. Thanks to Joao Corte and his beautiful wife Cathy who shared the secret of grilling bebinca. Could not wait to try it out, so here we go..

Grab
2 cups of sugar
2 cans of coconut milk/cream
12 egg yolks
1 cup flour
1/2 tsp grated nutmeg
ghee

Mix the sugar with the coconut milk/cream, then add the egg yolks and mix well. Sift the flour and grated nutmeg over the coconut and egg yolk batter and mix all of it thoroughly.  Grease an 8" round pan with ghee. Pour 3 big spoonful of the batter into the pan and let it cook on the stove for 15 -20 mins. In the meantime pre-heat the oven/grill at 150 deg C. When the first layer is cooked, take it off the stove and spread a teaspoon of ghee on the top. Place another 3 big spoonful of batter on the top of the first layer and grill it in the oven for 25-30 mins.  Repeat the process by spreading ghee on the cooked layer and then the batter and bake each layer for 25-30 mins. until all the batter is used.  You should get 7-8 layers of bebinca after some 6-7 hours of grilling.

Remove from the oven and let it cool completely. Turn it out from the pan and enjoy every bite of this most delicious dessert.

Patience is the key... You should be prepared to spend 6-7 hours in the kitchen... and there is no shortcut to making bebinca.. do not increase the oven temperature... do not bake the layers for less than 25 mins.... and you should get a perfect layered dessert called Bebinca.

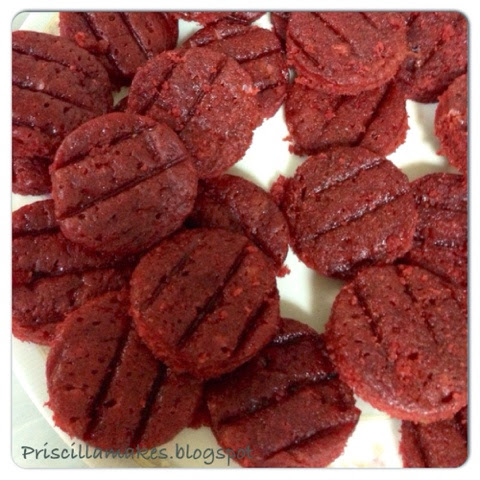
What is that red layer in there?.... i simply colored one of the layers with a dash of food coloring ;).

If I can make it... you can too. Try it out and let me know.

And if you are wondering what to do with the egg whites, I received a lot of suggestions when asked...i'll keep that for later. Okay let me share one... simple, make omelettes :).

Enjoy!!!


Monday, September 1, 2014

Cake shots!!!


It's been a while now since I have blogged. I have been busy doing cakes all through the week and on weekends, and have ended up with a stack of cake  crowns. 

While otherwise cake crowns don't last long in our house (my children can't wait till i have leveled a cake for decorating so that they can gobble down the crowns), my family was on vacation and hence cake leftovers. For once I had cake crowns left to recycle them into something beautiful and yummy!.

I took two 10 inch round cake crowns that I had cut out of 10 inch cakes.


With a small round cutter, the size of a dessert glass (oh I so love these dessert glasses, they bring out your creative side), I cut out circles. 


I layered the circles into the dessert glasses alternating them with cream cheese frosting. The cream cheese frosting was also made from leftover buttercream. I simply added Philadelphia cream cheese to the buttercream to get a lovely creamy textured cream cheese. 


Refrigerated these beauties and headed to the airport to receive my family, knowing well that they would indulge themselves in this simple, tasty and tempting dessert as soon as they got home.... But before that they had to have their dinner and .... Leave room for dessert.

Now for making cake jars..all I need are some mason jars.... 

Monday, July 21, 2014

Erika Makes - Asian Orange Chicken


Last weekend Erika threw a tantrum saying she wanted to eat Orange Chicken so we visited  PF Chang's for dinner. That was not all, we had to prepare it at home, so we google searched the recipe and guess what we found it at allrecipes.com.  We shopped for the groceries and got down to preparing it for dinner.

Now this was not a dish I prepared. I only assisted Erika with fyring the chicken. Oh here's the recipe http://allrecipes.com/recipe/asian-orange-chicken/

According to the reviews, many suggested coating the chicken with egg before coating with  flour. It does help... We also adjusted the cornflour as suggested. We mixed 1 tablespoon cornflour with 2 tablespoons of water.  And we substituted the rice vinegar with apple cider vinegar as rice vinegar is not available in Kuwait (and don't go looking for it... don't ask me why???).

Erika was very happy with herself...that she had prepared a dish which is served at PF Chang's.... and that it tasted absolutely yummy.  Yes, this ones a keeper...

Proud of Erika!!!! Thank you for the scrumptious dinner. 


Sunday, July 20, 2014

Quesadilla


While shopping at TSC, Erika picked up a packet of tortilla and I knew just exactly what she was thinking. So I picked up the shredded mozzarella cheese and the rest of the ingredients. 

Last night we got busy cooking. Erika brought the laptop into the kitchen to follow the recipe. 

Makes 2 quesadillas

You will need:
4 tortillas 
Olive oil 
300-400 grams shredded mozzarella cheese. 
2 halves chicken breast 
Ginger garlic paste
Salt
1/2 lemon juice
1 onion sliced
1 tomato sliced
1/2 colored capsicum sliced
1/2 carrot sliced 
1 cup lettuce chopped 
Pepper
 
Preparation:
Cut chicken into small cubes. Marinate with salt, ginger garlic paste and lemon juice for 15 mins. 
Meanwhile cut onions, tomatoes, capsicum, carrot and lettuce. 
Heat 2 tbsp oil and sauté onions, capsicum and carrots. Add chicken and stir fry for 5 mins. Add tomatoes and let cook on low flame for 10mins. Add lettuce and cook for another 5 mins. The quesadilla filling is ready. 

For the quesadilla:  On a low flame, drizzle 1 tbsp oil in a frying pan. Place tortilla on the pan. Scatter some of the shredded mozzarella cheese on the tortilla. 

Then place 1/2 of the cooked chicken on the cheese. 

Sprinkle pepper and scatter cheese over the chicken.

Cover with tortilla.  Cover the pan and let it cook on a low flame for 5 mins. 


Lift the tortilla using a wide spatula and drizzle oil on the frying pan. Then flip the tortilla and cook the other side  for 5 minutes wih the pan covered.


Remove and place onto a serving plate. 


Cut tortilla into 6 wedges and serve. 

In the original recipe the chicken is not cooked. Instead after scattering the cheese on the tortilla sinply scatter the marinated chicken and all the veggies, season with pepper, then add the cheese and cover with the tortilla. Cook for 10 minutes on each side on a low flame. 

We tried both versions of the recipe, both taste the same. 

You can add more seasoning if you wish to. You can also use shredded cheddar cheese instead of mozzarella. You can almost add any meat for the filling with a lot  of add-ons that suit your palate. 

This Mexican appetizer is a favorite of Shawn and Erika's. After all it's finger food.....

Monday, July 14, 2014

Jewel in the crown - cake

A friend of ours sent me this picture....saying "what say amazing cake", and I sprang to the opportunity, which otherwise was on my low priority "to do" list.


I looked up the tutorial and decided to make it a weekend project as it involved baking two cakes with cooling time between the two. 

I decided to bake  my cake from scratch and not to use the cake mix as I have never used cake mix. After coloring the batter which I did in individual bowls, I realized that I should have poured the batter into the measuring cup, colored it one at a time and then poured it out into the zipper bag. 


A cup of Pink, blue, yellow, green and orange cake batter ready to be strewned into the cake pan to give it a tie-dye effect. 


This is the fun part and the most agonizing part too. Piping out the batter from the zipper bag after snipping a small corner was painstaking and pretty messy. At a point I had batter coming out from both ends of the zipper bag making it very messy. My fingers went numb piping the batter and my brain went numb having to remind myself that I need to pipe a little of each color to achieve the tie-dye effect. 

It took a little less than 30 minutes to color and pipe out the cake batter into the pan, while otherwise it would take only 1 minute to pour the batter into the pan. And It took exactly 70 mins to bake. 


Gorgeous looking colorful cake. Felt like eating it right away. Left it overnight on the rack to cool.

The next day I cut the cake into 1 inch slices and cut out hearts using a heart shaped cutter. Placed them in the frezzer for about 4 hours.


I prepared the cake batter for the second cake. Poured a cup full of batter into the pan and lined up the frozen heart shaped cake in the middle of the cake pan, then filled in the sides and covered the top with batter. The pan was a little more than 3/4 filled and I had my doubts so I let go some of the batter so that the batter would not overflow while baking.      


It took 90 minutes to bake and there was this huge mountain in the middle which was taking a lot of time to bake. I was worried about the sides getting burnt, but that did not happen. Pulled out the cake from the oven and tossed it on the rack to cool.

When the cake had cooled and it was time to cut through I was trembling and felt like I was competing in Masterchief. Had to do what I had to do and ta da....

Oh!!! the hearts had risen.....and i missed a heart beat...I knew what had happened, but then that is not what should happen, so what should be done so that it does not happen?????????  too many questions on my mind.. 


I looked for more tutorials and found this https://www.youtube.com/watch?feature=youtube_gdata_player&v=jBoqh8M8ltU&app=desktop I will follow this tutorial the next time I make this cake.

My cake earned its name "jewel in the crown". Hudson, who inspired me to bake the cake named the cake so, to cheer me up.  I am sure going to try it out again....

Wednesday, July 9, 2014

Instant Poha


Today I made poha for the first time. Poha is flattened rice or otherwise known as rice flakes. I bought some with the intention of making it but kept putting it off for some reason or the other. 

I called mom to speak to her and she told me that she had gone visiting my aunt, and that she was served poha which my uncle had prepared. Well that was it... Memorized the recipe and went off to the kitchen to make poha instantly. 

You will need:
100 grams Poha (1 and 1/2 cups).
1 medium potato
A handful peanuts 
2-3 tbsp oil
1 tsp. mustard seeds
6-8 curry leaves
1/4 tsp. turmeric powder
1 small onion finely chopped
1 green chilly finely chopped
Salt
1/2 bunch coriander leaves finely chopped
2 tbsp. fresh grated coconut (optional) 
1 lemon

To prepare:
1. Wash the poha and leave in a strainer to drain the water.
2. Cut the potato into 4 halves and boil it with salt.  
3. Add the peanuts and let them boil with the potato. 
4. In a non-stick pan heat the oil and add mustard seeds and curry leaves.
5. Then add the onions and let them fry till translucent, add chillies, turmeric powder and fry for a minute.  
6. Add the poha and mix well with all the ingredients.  Add salt and simmer for 5 minutes.
7. Cut the boiled potato into small cubes and add to the poha mixture along with the peanuts.
8. Remove into serving dish and garnish with coriander and grated coconut.
9. Serve hot with lemon wedges. 

It tasted just like mom's. She would make it for tea, a perfect snack for a rainy day... I had mine for dinner and it was just right and light. 

Feeling great.... feeling at home. 


Friday, June 27, 2014

Dal Makhani

The king of Dal...


I always thought Dal Makhani was made using a lot of butter... (makhan means butter) and that it got its rich and creamy texture from the butter.  I was also of the opinion that Dal Makhani was a dish reserved for the kings of India and was served in palaces only. When I first had Dal Makhani at Hotel Crowne Plaza, I thought it was a dish served in 5 star hotels only, and yes after eating it I was convinced that its a dish meant for kings and only chef's of 5 star hotels could prepare it.

Little did I know that Dal Makhani is a staple dish of Punjab, and that butter is not the ingredient that gives it its rich and creamy texture and taste. A couple of days ago a member on Chef at Large FB group posted a very tempting  picture of Dal Makhani which she had prepared for her guest, and posted the recipe link too.

Now was my chance to make Dal Makhani at home. So I went to the link 
and read the recipe for the first time. Oh, what is black urad dal, never heard of it, never seen it.... for a person like me who loves dal. Okay, I needed to find this main ingredient and I was right in going to an Indian bakala (grocery shop) where I picked up all the other ingredients too and headed home to soak the dal and kidney beans. I felt like royalty while preparing the Dal Makhani. I learnt that it is the tomato puree and thick cream that gives it its rich and creamy texture and I learnt that it can be prepared at home by almost anyone.

Here's my take on the Dal Makhani.  I made some rotis to go with the it, though it can be served with rice, jeera rice and naan.


Everyone enjoyed it. It was lip smacking, finger licking Dal Makhani. 

While still researching on Dal Makhani, I learnt that though a staple food of Punjab it is a dish prepared at weddings, birthdays and important events, and what makes its special is its traditional way of cooking the dish. 

Dal Makhani, King of Dal.

Bebinca